
Repainting your car is one of the most effective ways to breathe new life into an aging vehicle, cover up imperfections, or simply refresh its appearance. Whether you’re aiming for a showroom-quality shine or restoring your vehicle after an accident, understanding the car repaint process can help you know what to expect and make informed decisions.
Here’s a step-by-step guide to the car repaint process so you can feel confident every step of the way.
Step 1: Initial Inspection and Planning
Before any paint touches your car, the technician will conduct a thorough inspection. This helps identify damage like dents, rust, or existing paint issues that need to be addressed before repainting. At this stage, you’ll also choose the new color and finish (matte, gloss, metallic, etc.).
Key decisions include:
- Whether to stick with the original color or opt for a new one.
- Choosing a single-stage or multi-stage paint system.
- Discussing the desired level of detail and cost.
Step 2: Surface Preparation
This step is perhaps the most important. Great paint jobs rely on proper preparation. The car’s surface must be free from dirt, grease, old wax, and flaking paint.
Common prep work includes:
- Cleaning and degreasing: Removes contaminants that could affect paint adhesion.
- Abrasive Blasting and Sanding: Depending on the condition of the existing paint, technicians may sand the surface or use abrasive blaster nozzles to strip away old coatings, rust, or corrosion. Abrasive blasting is especially effective for stubborn areas or when a bare-metal finish is needed. Sanding helps smooth out the surface, ensuring a uniform base for the new paint.
- Masking: Windows, trim, tires, and areas not being painted are carefully masked to avoid overspray.
- Priming: A primer is applied to create a smooth and adhesive surface for the new paint. It also helps protect the metal underneath.
Step 3: Repair Work
Before the paint goes on, any bodywork repairs must be completed. This may include:
- Fixing dents or scratches.
- Treating rust spots.
- Applying body filler for deep imperfections.
After repairs, the car is sanded again to ensure a uniform surface.
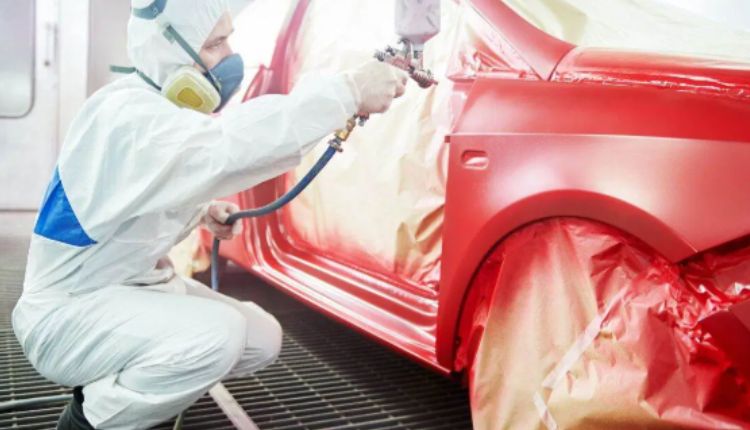
Step 4: Applying the Base Coat
Now comes the fun part — color application. Depending on your paint type, the technician will apply multiple layers of base coat.
- Single-stage paint combines color and gloss in one step.
- Two-stage paint involves applying a color base coat followed by a clear coat for shine and protection.
Each layer is applied in a dust-free environment, often inside a paint booth. The technician allows appropriate drying time between coats to ensure proper adhesion and finish.
Step 5: Applying the Clear Coat
After the base coat has dried, a clear coat is applied to protect the paint and give it a glossy (or matte, depending on the finish) appearance. This top layer helps resist UV damage, weathering, and minor scratches.
Multiple layers of clear coat may be applied, and each is given time to dry thoroughly.
Step 6: Curing and Drying
Once painting is complete, the car needs time to cure. Professional auto body shops often use heat lamps or bake ovens to speed up the curing process. However, even if the car looks dry, full curing can take days or even weeks depending on the type of paint used.
During this period, you should avoid washing or waxing the vehicle to allow the paint to fully harden.
Step 7: Polishing and Detailing
After curing, the car undergoes final polishing and detailing. This step enhances the shine, removes any surface imperfections, and ensures the paint looks as smooth and vibrant as possible.
Detailers may use:
- Polishing compounds to even out the surface.
- Buffing tools to bring out the gloss.
- Detailing products for trim and glass to make the whole car look brand new.
Step 8: Final Inspection and Delivery
Finally, the vehicle is thoroughly inspected. The shop will check for any paint inconsistencies, missed spots, or surface blemishes. Once everything is approved, the car is ready to be returned to you, freshly painted and ready to turn heads.
Things to Keep in Mind
- Quality matters: Cheaper paint jobs may skip important prep steps, resulting in a shorter lifespan or poor finish.
- Timeframe: A full repaint can take anywhere from a few days to over a week, depending on the shop and complexity.
- Care after painting: Avoid harsh chemicals, pressure washing, or waxing for at least 30 days after repainting to allow full curing.
In Conclusion
Repainting a car is a detailed and skill-driven process that involves much more than just spraying on a new color. From prep work to clear coat, each step ensures your car looks great and stays protected for years to come. By understanding the process, you can better appreciate the craftsmanship involved — and feel confident in getting the fresh look your vehicle deserves.